More than likely you ended up on this article because you encountered the DNS Probe Finished NXDOMAIN error in some form. The error code is a common occurrence alongside the dns_probe_finished_bad_config error code or Unidentified Network – No Internet Access Error. Most of these error messages signify that the DNS lookup failed. Luckily, there are easy ways to fix this error. In this article, we teach you how to fix the error code dns_probe_finished_nxdomain.
What Does DNS Probe Finished NXDOMAIN Mean?
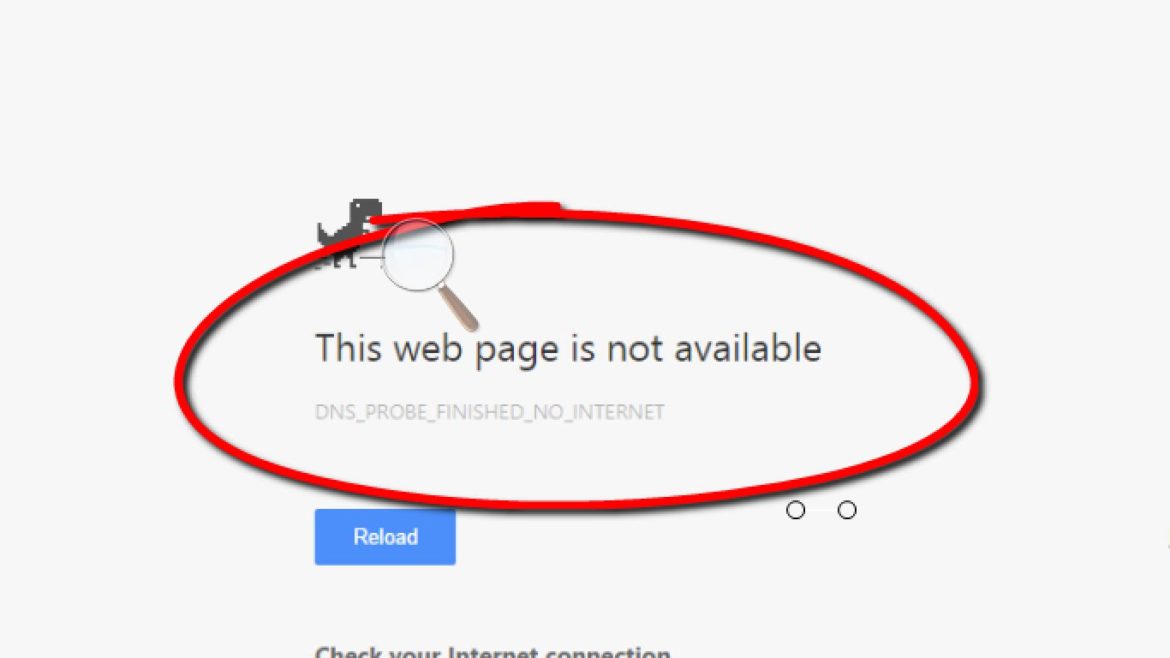
The dns_probe_finished_nxdomain occurs when there is an error with your computer’s DNS configuration. It means that there is an error that is preventing your device from accessing a website or domain via your internet connection. The server at any website can’t be found because the DNS lookup failed.
DNS is the network service that translates a website’s name to its Internet address. This error is most often caused by having no connection to the Internet or a misconfigured network. It can also be caused by an unresponsive DNS server or a firewall preventing Google Chrome from accessing the network. Try the following to fix the error on Windows devices:
How To Fix dns_probe_finished_nxdomain Error Code
Firstly, the most popular fix is to restart your router¹. Yes, it’s that simple. Turn off the power supply to your router and leave it off for about 10 seconds. Restart the router by turning the power on again.
And, for good measure, restart the device that is experiencing the DNS Probe problems as well. Once everything restarts, test your internet connection to verify that it is working, if not continue with the tutorial.
Modify DNS Address
- Hold Windows key and press R
- In the run dialog, type cmd and click OK
- When the Black Command Prompt opens, type the following in it and Hit Enter.
ipconfig /flushdns
The ipconfig /flushdns command flushes the DNS cache. A flushed cache erases any modifications int he DNS settings and the system.
- Once done, Hold Windows key and press R again.
- Now, type ncpa.cpl and Click OK.
It takes you to the network connections, and you need to update your DNS settings via the interface.
-
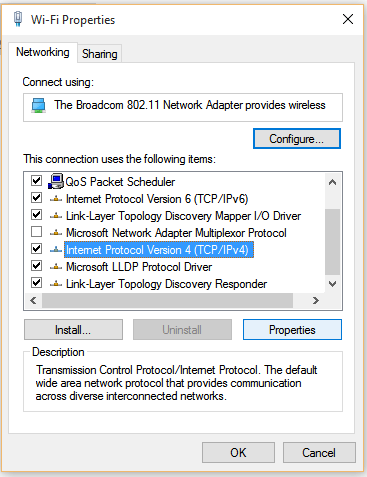
- Select the network connector or connection that you wish to troubleshoot (Wi-Fi or Ethernet adapter).
- Right-click it, then choose Properties.
- Via the properties panel, click “Internet Protocol Version 4 (TCP/IPv4)”until it turns gray and select Properties again.
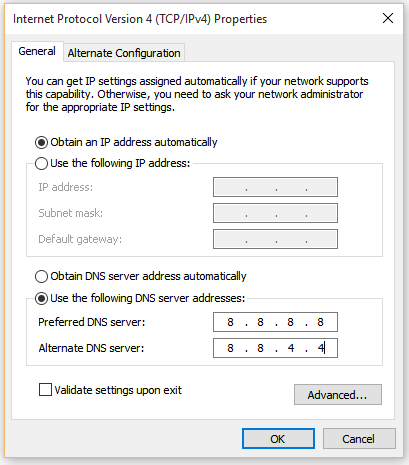
- Check or select use the following DNS server addresses and enter the following for Preferred DNS Server and Alternate DNS Server
Preferred DNS SERVER: 8.8.8.8
Alternate DNS SERVER 8.8.4.4
- Click OK and close the rest of the windows. You can use the following video to see how to perform the fix above.
DNS Probe Mac OS X Fix
- From the Apple menu, click System Preferences, then click Network.
- If the lock icon in the lower left-hand corner of the window is locked, click the icon to make changes, and when prompted to authenticate, enter your password.
Select the connection for which you want to configure Google Public DNS. For example:
- → To change the settings for an Ethernet connection, select Built-In Ethernet, and click Advanced.
- → To modify the settings for a wireless connection, select Airport, and click Advanced.
Lastly, select the DNS tab.
- Click + to replace any listed addresses with, or add, the Google IP addresses at the top of the list:
-
Preferred DNS SERVER: 8.8.8.8
Alternate DNS SERVER 8.8.4.4
- Click Apply to save
Bonus tip: Do you need to know how to flush the DNS cache on MAC OS? Click the link for a full guide on how to do just that on different MAC OS’.
Use Command Prompt
By default, a computer is set to use the internet settings configured on your router or modem. Your internet service provider provides the settings, and they remain the same unless changed. If there is an issue with your web configuration, then you can open a command prompt window with Admin privileges and run the following commands:
Open Command Prompt Window
- Type cmd in the Windows search box and hit enter.
- Alternatively, you can also use these shortcut keys ”Windows Key + R” then type in cmd and hit Enter.
Run The Following Commands
Each line of code must be entered separately. After you enter one code, hit Enter on your keyboard and then do the same with each other code per line:
ipconfig /release

Then,type in the following code and hit enter:
ipconfig /all

After, input the below code + tap enter:
ipconfig /flushdns

Lastly,type the below code + hit enter:
ipconfig /renew

After the above codes execute, input the following codes one at a time.
Don't forget to hit enter after each line of code.

netsh int ip set dns
netsh winsock reset
Once you complete the above steps. Restart your computer. Upon a successful restart, Windows reorganizes your records and the record causing the error is deleted and replaced. Check to verify that your internet connection works correctly. If not, continue with the tutorial.
Other Troubleshooting Tips To Try
If, by chance, you still have issues with your DNS set up after trying all the above, here are a few other things you can do to fix the problem.
- Update your Network driver
- Delete cookies, Browser Temp files & cache
- If the error occurs in Chrome, try using a different browser. If that browser works, delete and reinstall Chrome to resolve the issue.
Firewall & Antivirus Blocking DNS
Check both your Firewall and Antivirus to ensure that it is not blocking any network connections. Sometimes this can happen after a recent update. Disable each and check to see if the problem resolves itself. If it is one or the other, rollback any recently made changes.
Disable Website Filters
Web filters like parental control features may adversely affect your entire range of IP/DNS settings. Disable any such software and test your connections. This is especially true if you use the Google Chrome Web Browser.
Chrome Users
Lastly, for those of you using Google Chrome, you can try the following to help fix the problem:
Type “chrome://flags/” in the address bar and press Enter.
Now, click “Reset all to default” button (Right Side).
Finally, relaunch Google Chrome. Verify that your browser works.
These are all the effective tips that fix the DNS_PROBE_Finished_NXDOMAIN error. If this article helped you, you might also like:
- What is a DNS Error? How to Fix DNS Server Not Responding?
- How to Fix DNS Server Unavailable Error
- Here’s How To Fix DNS Probe Finished Bad Config Errors
- dns_probe_finished_no_internet Fix
- ERR_CONNECTION_RESET: Chrome, YouTube, Windows Fix
- ERR_NAME_RESOLUTION_FAILED Fix – Solution
- One or More Network Protocols Are Missing – Ways to Fix
- Superfetch | How to Enable/Disable Prefetch on Windows
- What Does Not Registered On Network Mean?