Windows 10 may be new but it has a host of issues such as the brightness control malfunction. This tutorial will take you through all the necessary steps to learn how to adjust the brightness in Windows 10 and fix the brightness control issue. This issue mainly affects laptops running Intel processors. The brightness button does not work when the user upgrades to Windows 10 from Windows 7, Windows 8 and Windows 8.1.
The screen brightness malfunction was also seen in Windows 8 when users would have had to upgrade from Windows 7.However, let us go through the necessary steps to fix the brightness control issues on your Windows 10 laptop. N.B There is a video tutorial at the end of the post if you’re not fond of reading which should be easy if you’re using Microsoft Edge.
Why the laptop brightness button does not work after windows 10 update?
Apart from the compatibility issues with intel, the reason why the brightness button does not work is due to missing drivers. Most Intel processor have on board graphics and graphic drivers that will get deleted during a system update. This in turn leads the system to not detect the the graphics hardware installed on your PC.
Therefore, in order to get the brightness feature to work on Windows 10, you will need to download and install the necessary drivers. Here are two easy ways to resolve the issue on your laptop or desktop.
Solution 1 –Use the Built In Device Manager to Fix the Brightness Issue
The first method involves using the device manager on your computer to fix the brightness control issue. This is the most favorable way to go about fixing the issue. The device manager keeps a record of all the drivers and hardware components of your PC. It even shows you information for devices that you connect to your computer such as headphones and mics. This way you will know if you require a driver or not.
In this case, there is a built in graphical hardware component which provides the graphics related function to the PC. But the drivers will not be installed as the computer has just updated to windows 10. So you would need to download and install the drivers first. For installing drivers using device manager, follow the steps below.
Step 1: Press the start button and search for “device manager”.
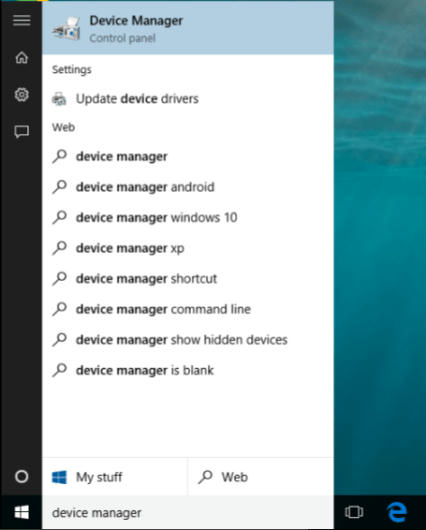
Step 2: Select device manager from the pop up menu.
Step 3: Search for “display adapter”. Under display adapter, you will see “Microsoft basic display adapter“. Right click on it and choose “Update driver software“.
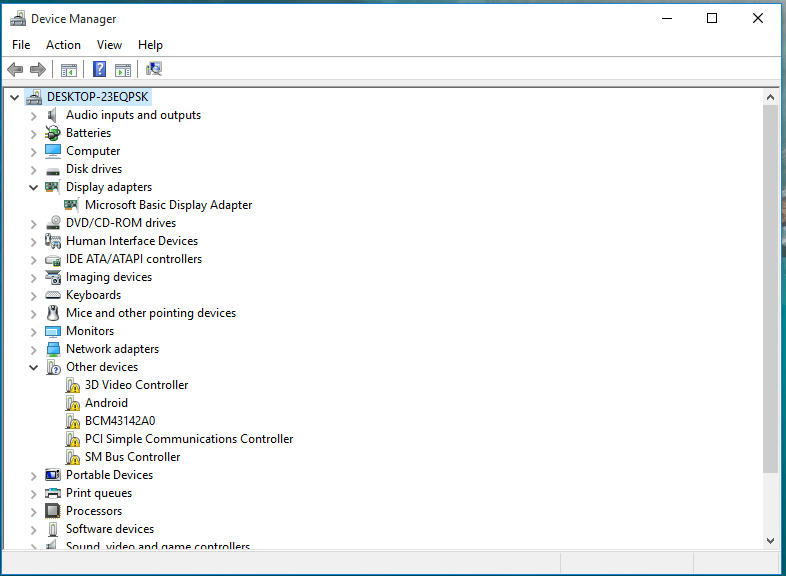
If the drivers are already up to date then proceed to step four.
Step 4: Navigate to “other devices”. There you may see various devices without drivers. Update them and be sure to update the display drivers. For eg: “3D video controller” in this case.
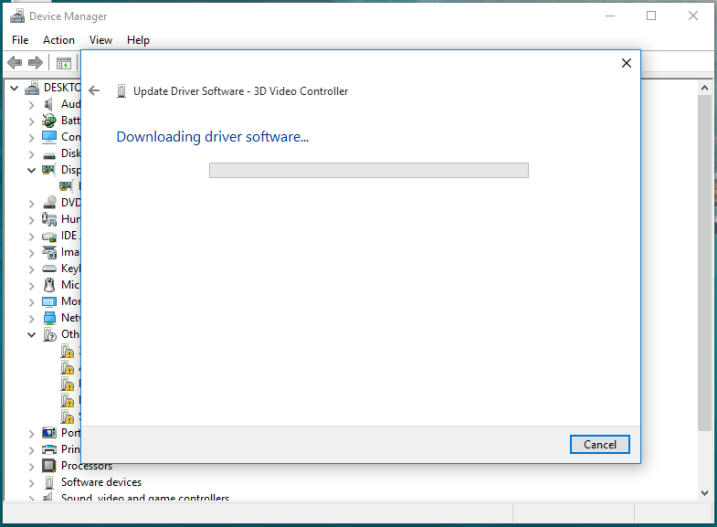
Step 5: You may need to restart your computer. Even if you do not receive a prompt to do so then do a manual restart.
If you get a success message, then you are finished instilling the inbuilt graphics drivers. In some cases, the above method won’t able to download the software/drivers for your display adapter. You can check the device manager again for the same drivers. In this case, after updating the drivers, the PC will get the Intel HD graphics option. This will fix the brightness issue on Intel based Laptops.
Solution 2- Brightness issue fixing using 3rd party software
So, the above method did not quite work out for you? Here is a n alternative. Using the methods below will require you to use third party software to update and install the required graphic card driver.
The first piece of software is 3d Chip. 3DP Chip is a useful program that will automatically detect and display the information on your CPU, motherboard, video card and soundcard, etc installed on your PC. You can also choose to copy the information into your clipboard with one click for later use (such as posting in a forum). If you have working internet connection, you can choose to download the latest drivers for all of these components.
Step 1: Download and install 3D chip software from the official page.
Step 2: After installation, open it.
Step 3: Now you can see all of your hardware components which don’t have required drivers. There will be an alert symbol against the hardware parts that are missing drivers.

Step 4: Press on Video card [or whatever option resembles your graphics driver].
Step 5: Now you will be redirected to a page from which you can download the necessary drivers.
Step 6: Install the drivers after the download completes. Your PC should now be up to date and all you will need to do is restart the device and use it like normal.
The Second tool is Drivermax. DriverMax is a new tool that allows you to download the latest driver updates for your computer. No more searching for rare drivers on discs or on the web or inserting one installation CD after the other. Just create a free account, log in, and start downloading the updates that you need.
Step 1: Download and install the drivermax software.
Step 2: Open the tool and click on the “Scan for driver updates” option.
Step 3: Now you can see all the hardware components with missing or outdated drivers.
Step 4: Find out your graphics hardware component from the list and download the drivers.
Like 3D chip, you don’t need to install the downloaded drivers manually. Drivermax automatically installs the downloaded drivers. You can go ahead and restart your computer to ensure proper installation.
If you’re having trouble then you can look at this short video showing you how to use drivermax and device manager to update your drivers.