What happens when someone steals your laptop? Once the person gains access, they have access to all your personal files. However, with Windows 10, encryption is easy to set up. By using full-disk encryption on your laptop, you protect your data in the event that you lose your laptop. In this article, we discuss the various ways to encrypt your hard drive on Windows 10.
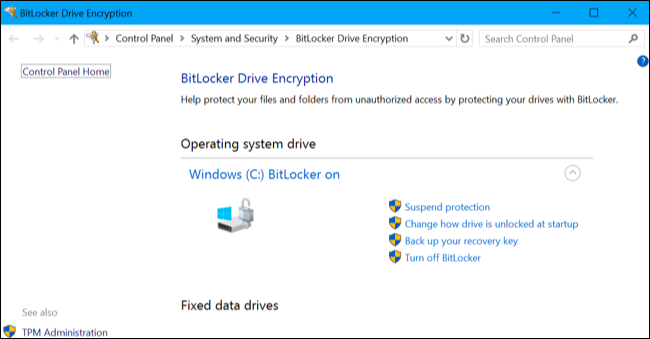
An image showing BitLocker Windows 10 home encryption set to active.
Question & Answer Section
What Is Full Disk Encryption?
Full–disk encryption (FDE) is encryption at the hardware level. FDE works by automatically converting data on a hard drive into a form that cannot be understood by anyone who doesn’t have the key to “undo” the conversion. Read more about it on Wikipedia.
Why Should I Turn On Full Disk Encryption?
You might also like to read:
- Is There A Way To Change Windows 10 Login Screen Background Image?
- Why Is My Windows 10 Internet Slow? – Ways To Speed Up Network Connection
- Here’s How To Get Windows 10 Free.
Things Do Before Using Windows 10 Encryption
Firstly, be sure to backup your computer. Furthermore, check to verify that your version of Windows 10 supports encryption. Basically, PCs that came with Windows 10 have it however you should check to make sure before going through with the full disk encryption.
The device encryption encrypts your drive even if you sign into Windows with a Microsoft account. And, once encrypted, your recovery key is then uploaded to Microsoft’s servers. Hence, you can recover your files if you ever forget or can’t log into your PC. Here’s how to check:
- Firstly, open the Settings app on your computer.
- Then, go to System, and then About.
- At the bottom of the About interface, search for Device encryption.
Do you see it? Then, chances are that you see that Device Encryption is enabled or that you can enable it by signing in with your Microsoft account as per the below image.
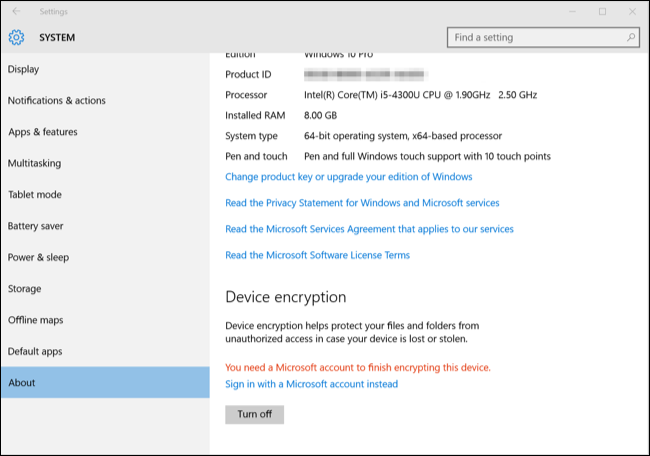
Encrypt Windows 10 by signing in with your Microsoft account
How To Enable BitLocker Windows 10 Encryption
For this method to work, you need to have Windows 10 Professional. There is no BitLocker for Windows 10 Home. However, there are a few things to check to ensure that your version of Windows is ready to be BitLocker encrypted. These include:
- Firstly, your computer should be equipped with a Trusted Platform Module (TPM) chip.
- Secondly, you may use BitLocker without a TPM chip by using software-based encryption, however, it requires some extra steps for additional authentication.
- Thirdly, your computer’s BIOS must support TPM or USB devices during the startup. Otherwise, you would have to check your PC manufacturer’s support website to get the latest firmware update for your BIOS before trying to set up BitLocker.
- Also, your PC’s hard drive must contain two partitions: a system partition, which contains the necessary files to start Windows, and the partition with the operating system; both of which must be formatted under the NTFS file system.
- Likewise, you need time and patience. Why? Because the process to encrypt an entire hard drive is time-consuming.
- Lastly, you need to keep your computer connected to an active power supply for the duration of the encryption.
How Do I Know If My Computer Has TPM hardware?
TPM is a unique microchip that enables your device to support high-level security features and provides a safe way to store encryption keys on a computer. Here’s how to know if your computer has one:
- Firstly, open the run dialog by pressing the Windows Key + R.
- Then, type tpm.msc and hit enter.
Do you see “Compatible TPM cannot be found”? Then, your laptop does not have the necessary TPM hardware. Your computer must have a TPM chip version 1.2 or later to support BitLocker. However, once you have a TPM chip, you may proceed accordingly.
Also, check out these articles,
- How To Download Windows Spotlight Images
- Is There A Way To Delete OneDrive?
- How To Get iMessage On PC
- What Are The Ways To Go Back To Windows 7 From Windows 10?
How To Turn On BitLocker
- Firstly, open the Power User interface by pressing the Windows key + X.
- Then, select Control Panel.
- In the Control Panel interface, select System and Security.
- Then, select BitLocker Drive Encryption.
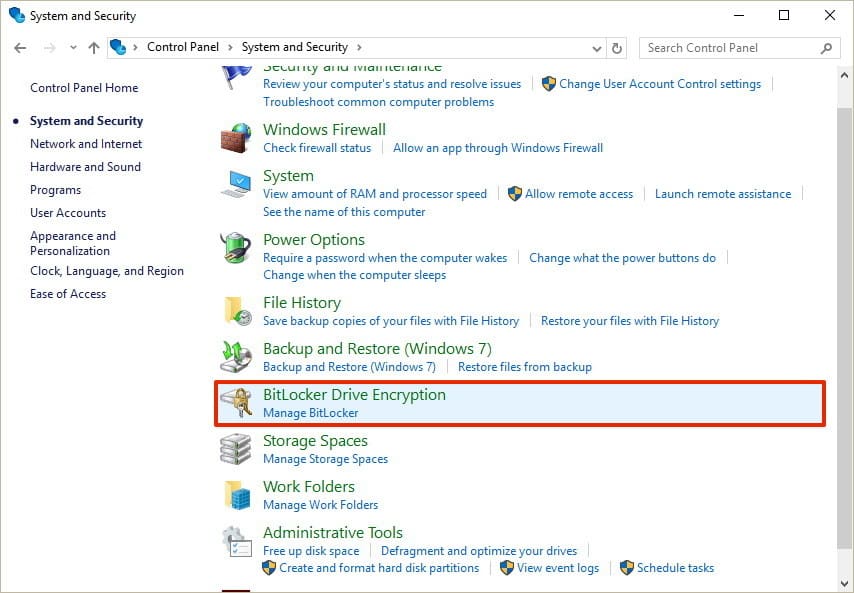
BitLocker Drive Encryption
- Lastly, select BitLocker Drive Encryption, then click Turn on BitLocker.
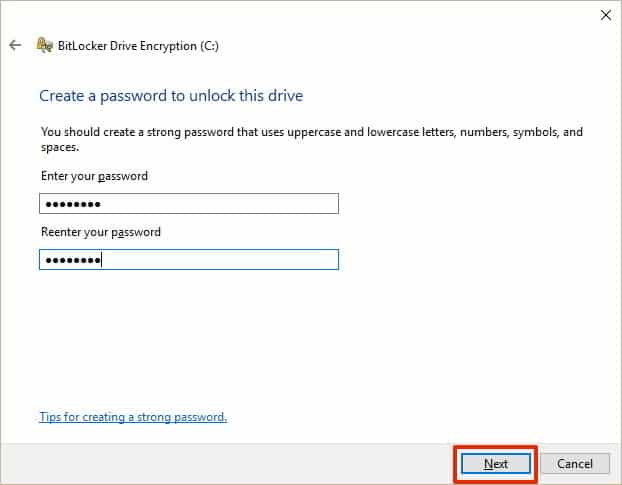
Once you complete the above, you have two options; Insert a USB flash drive or Enter a password to unlock your drive at startup. Let’s start with the Enter a password method.
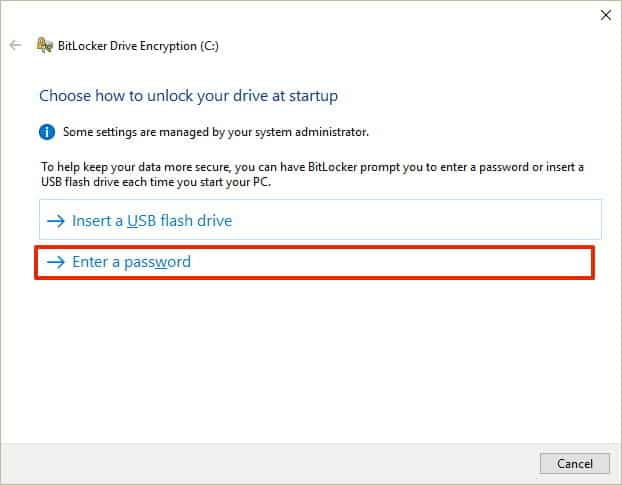
Choose a strong password for your full disk encryption.
Like our articles? We have plenty more for you to read:
- Automatically Close Applications When You Shut Down Windows 10
- How to Fix “DNS Server Unavailable” Error
- Fix: HDMI Sound Not Working Windows 10
- Here’s How To Login Automatically On Windows 10
Once you enter your desired password, click next. And, in the event that you forget your password, WIndows offers several options for backing up your password such as:
- Saving it to your Microsoft account.
- Copying it to a USB flash drive.
- Writing it to a file.
- Printing the recovery information.
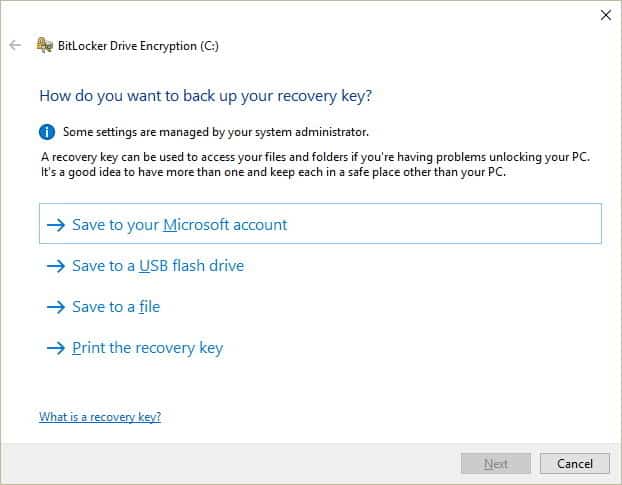
Select your preferred recovery option.
Choose A Recovery Method To Back Up Your Windows 10 Encryption Password
Once you choose the recovery method, click Next to continue. Then, you have two more options from which to make a choice.
- Encrypt used disk space only (faster and best for new PCs and drives)
- Encrypt entire drive (slower but best for PCs and drives that are already in use)
Select the one that applies to your computer and then click next to continue. Also, be sure to check Run BitLocker system check before you click Continue on the page after.
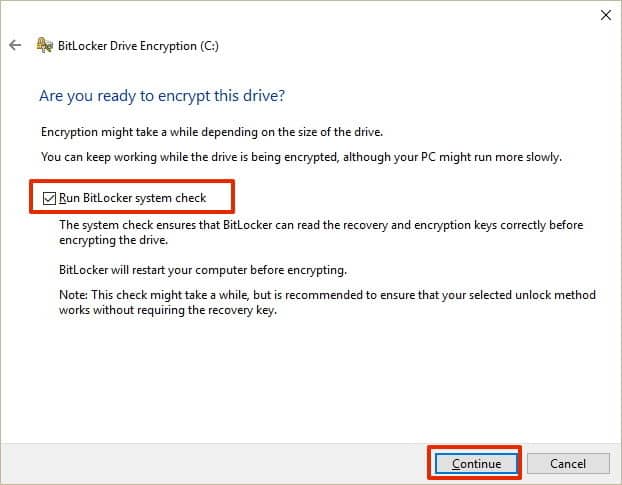
Finally, click continue and restart your computer. The encryption process begins on the next successful boot. BitLocker prompts you to enter your encryption password to unlock the drive.
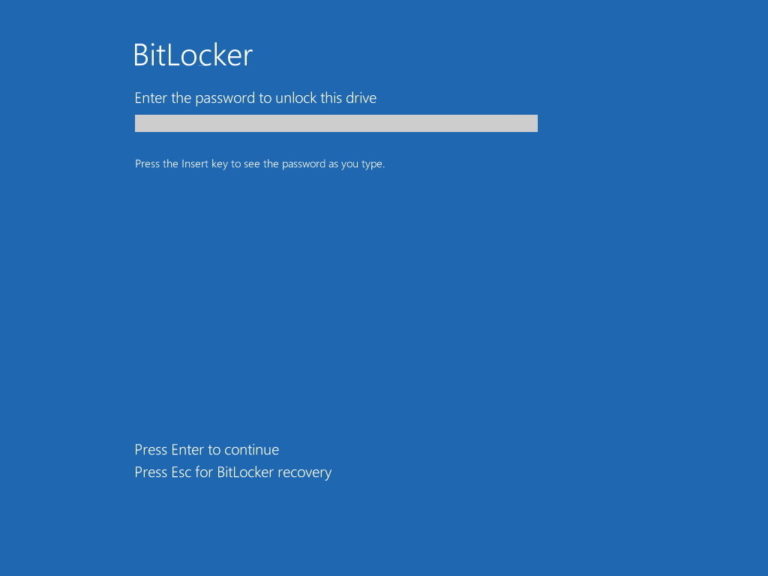
Once Windows boots, the encryption process begins in the background. You need not do anything else. Thanks for reading thus far. You might also like the following,
- Windows 10: An Overview & Complete Guide
- Active Directory: Check & Raise Domain, Forest Functional Level
- Best Laptop WiFi Hotspot Software For Windows
- Fix: “Windows 10 Brightness Control not Working”
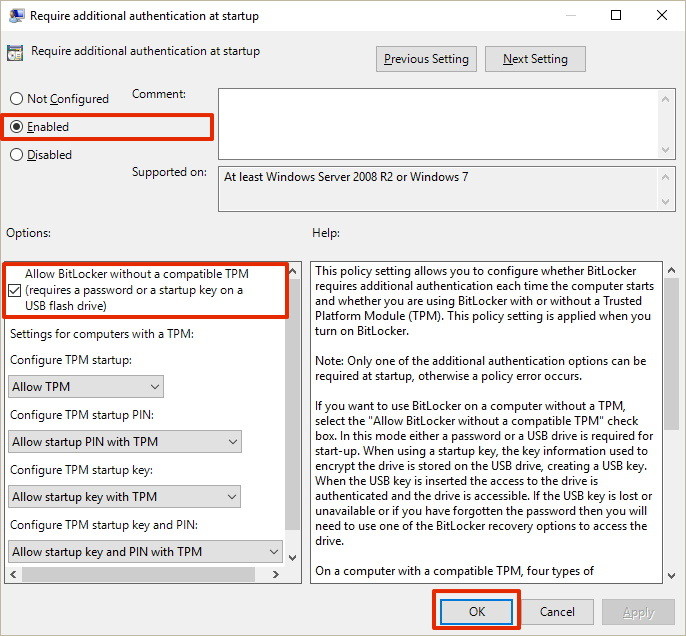
Can I Use BitLocker Without A TPM?
Yes. You may use BitLocker encryption without a TPM. However, you need to take additional steps to turn BitLocker on. Here’s what to do:
- Firstly, Windows key + R to launch the run interface.
- Then, type gpedit.msc, and click OK.
- Do you see Computer Configuration? Here, click to expand Administrative Templates.
- Then, expand Windows Components.
- Good so far? Then, expand BitLocker Drive Encryption and then select Operating System Drives.
- On the menu to the right, double-click on Require additional authentication at startup.
- Select Enabled.
- Finally, check the ‘Allow BitLocker without a compatible TPM (requires a password or a startup key on a USB flash drive)’ option and click OK.
That’s a bit complicated, right? See the below image for a visual demonstration of what we just did in the above steps:

Setting Up BitLocker without a TPM.
You may also like:
- How to Fix High CPU Usage By Antimalware Service Executable – MsMpEng
- Best Epub Reader For Windows
- Evernote Alternatives To Try
- How To Remove Action Center from Windows 10 Taskbar
How Do I Set Up Windows 10 Home Encryption
As mentioned previously, BitLocker is only available on Windows 10 Professional. However, you can use a service such as Veracrypt to encrypt your Windows 10 Home computer without using BitLocker. Here’s a good video walkthrough telling you how Veracrypt works:
How To Create An Encrypted Volume On Windows 10 Home
- Firstly, download and install VeraCrypt.
- Then, launch the VeraCrypt application.
- In the interface that appears, click Create Volume.
- Then, select a Volume type.
- For now, choose to Create an encrypted file container.
- On the next pop-up, select create a Standard Veracrypt volume.
- Then, select a name for and a place to store your volume.
All easy so far, right? Next, select an encryption scheme. Then, pick a volume size and create a strong password with which to encrypt the volume. After, you are asked if you plan to store large files, select the appropriate response.
Finally, on the Volume Format screen, move your mouse around to generate random data. Once you generate enough random information, click the Format button. Once the format completes you then need to mount the volume.
How To Mount Encrypted Volumes
- In the Veracrypt interface, click Select File.
- Then, go to the location you saved the recently created volume.
- Once selected, choose a drive letter and click mount.
- Enter the password created earlier and click ok.
And, you’re done! If you go to My Computer, you ought to see the encrypted drive. You can then copy all the files you want to the encrypted drive. Once the copying completes, you may delete the old files. And, for good measure, pull up the VeraCrypt interface and demount the encrypted volume when you aren’t actively using it.
Other Windows 10 Encryption Services/Software
-
Symantec Drive Encryption
-
DiskCrpytor
-
BoxCryptor
-
AxCryptor
We can’t let you leave without suggesting some further reading:
- How To Setup Dual Monitors For Windows
- Windows Modules Installer Worker High CPU Usage Fix
- How To Open A Port On Windows Computers
- Tweetbot For Windows – An Alternative